


How to Control the Warping of Parts in Thin Sheet Metal
Weld shrinkage cannot be prevented, but it can be controlled. Here are several steps that will prevent parts from being distorted after welding.
Posted: February 8, 2013

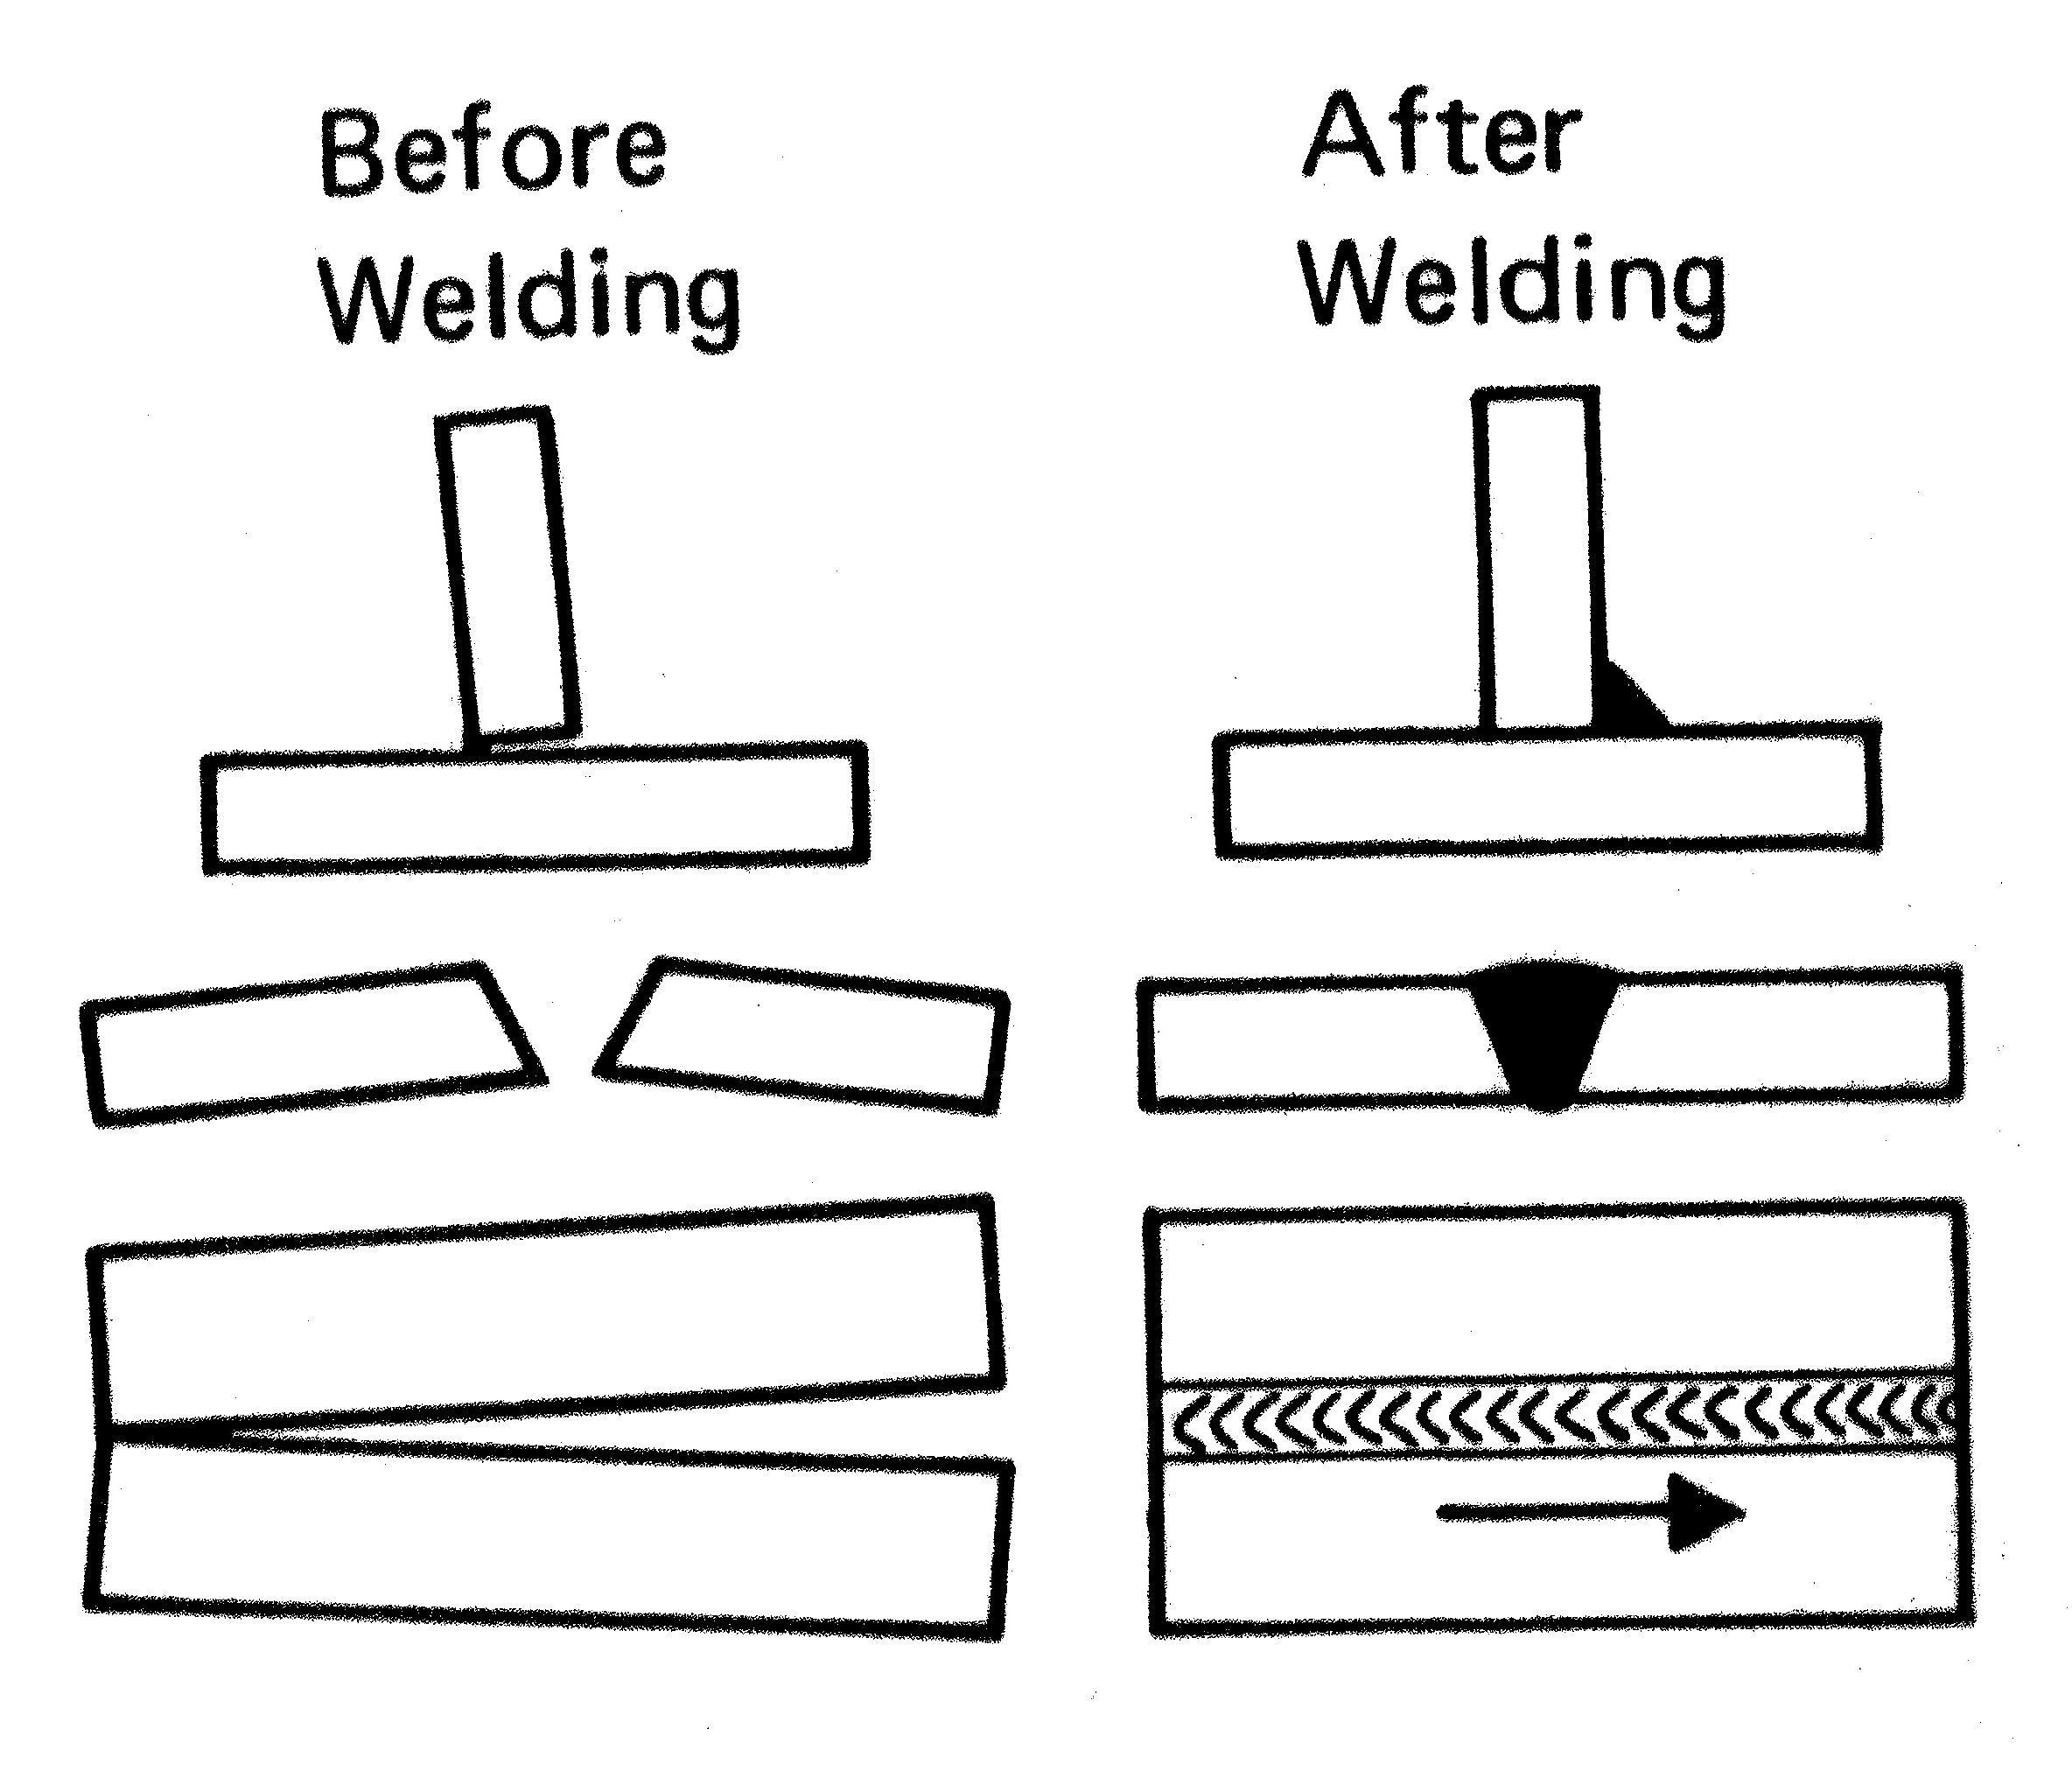

When laying a weld bead, filler metal is deposited at a high temperature above the melting point of material. This is approximately 2,500 deg F (1,370 deg C) for steel.
The weld wants to shrink as it cools to room temperature, but is restrained from doing so by the adjacent cold base metal.
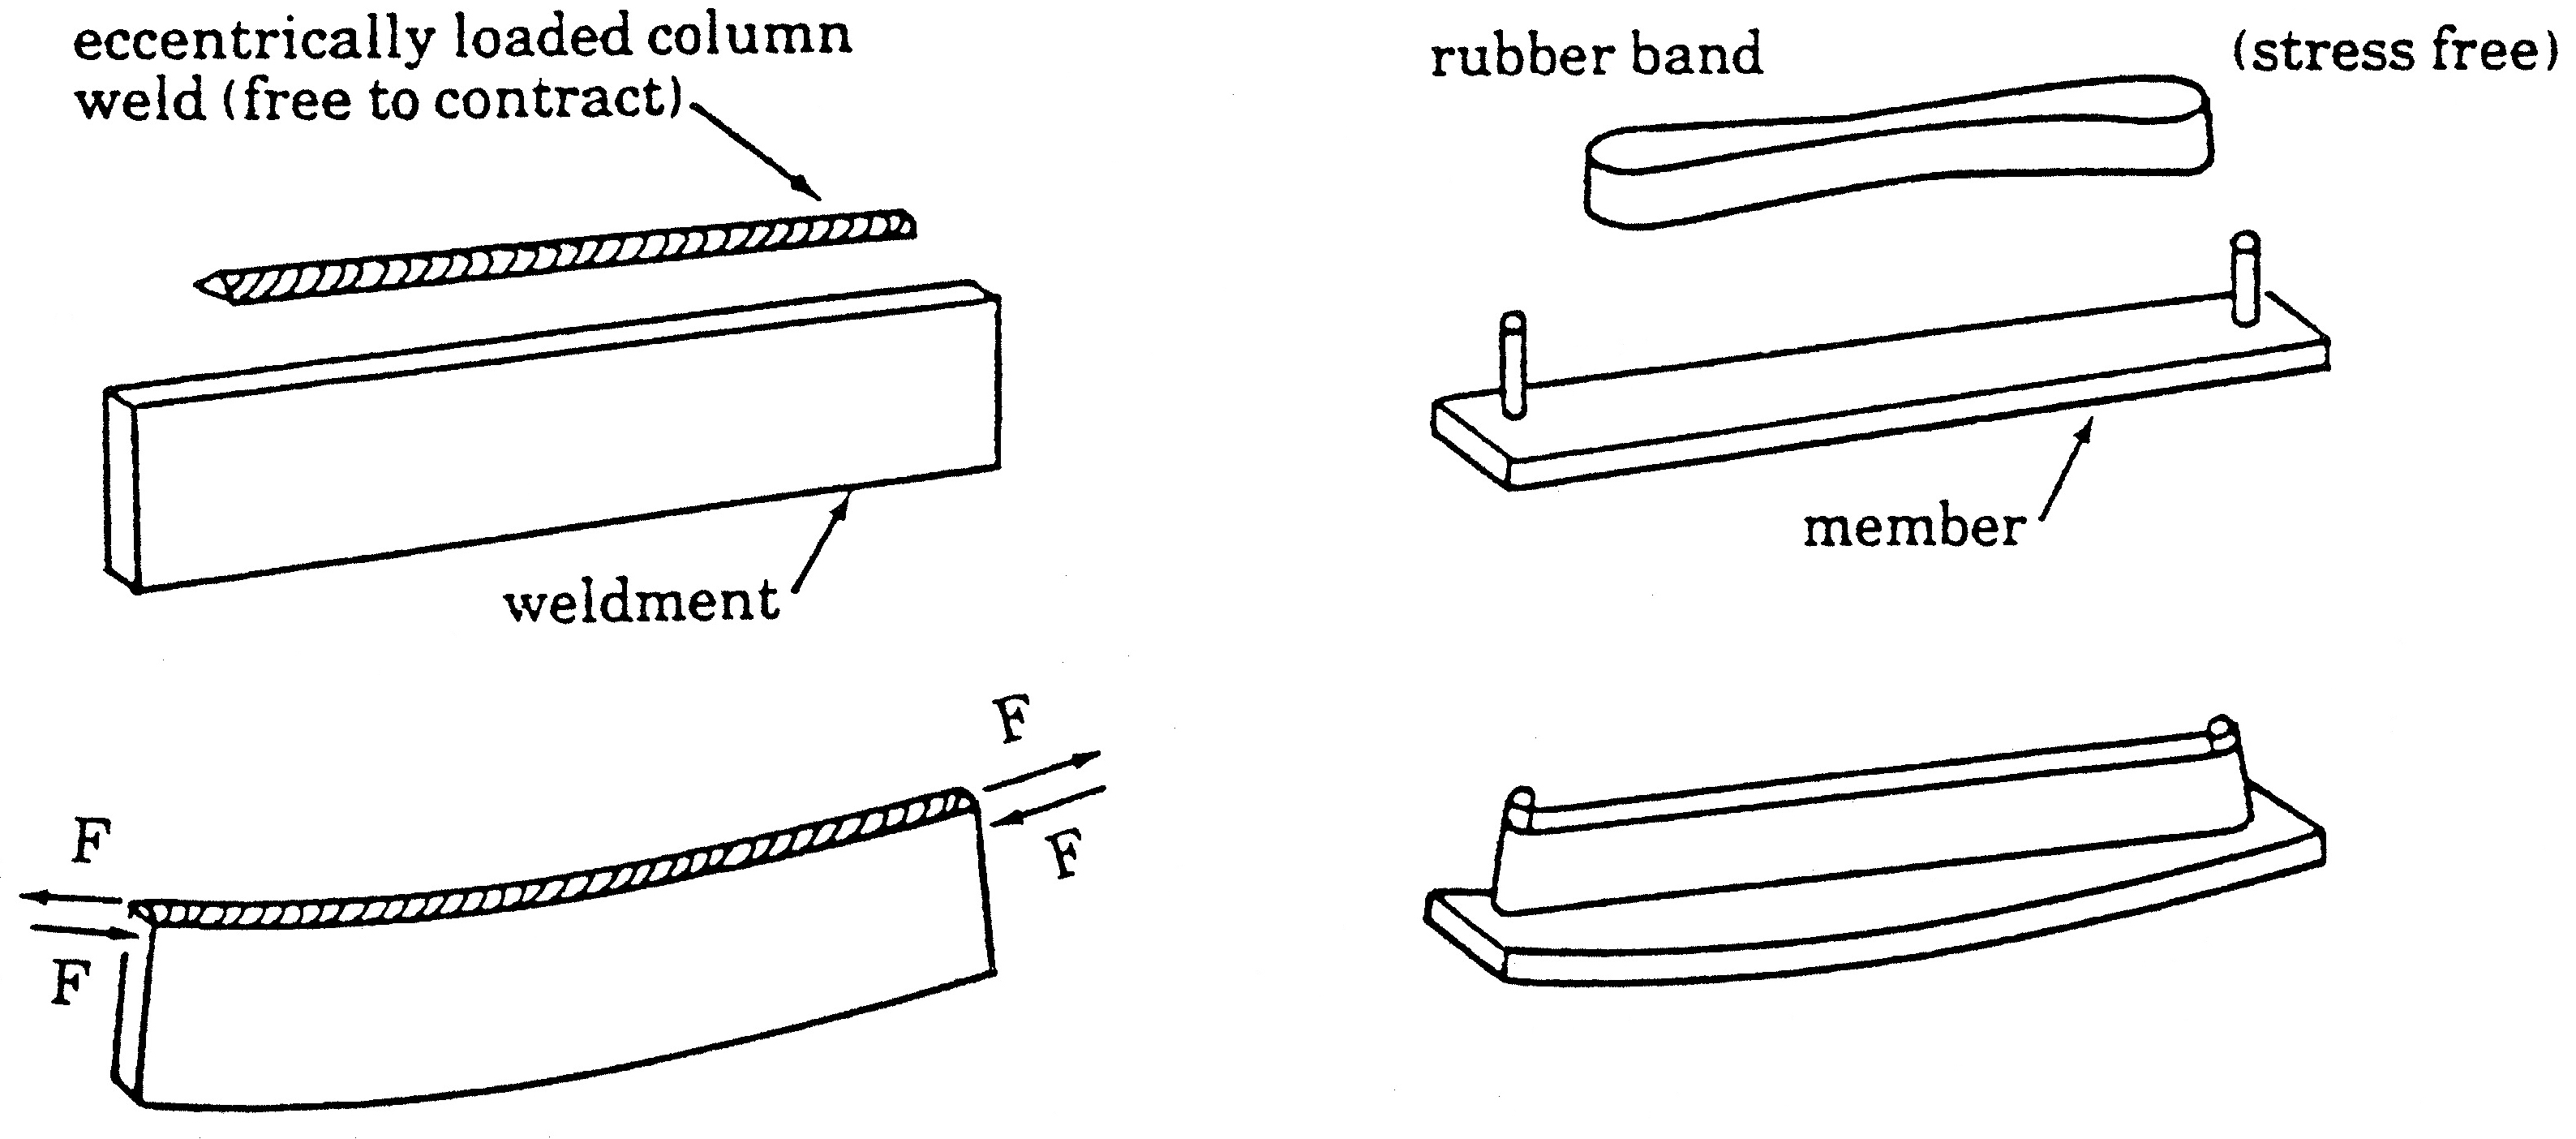
This restraint creates high-residual tensile stress that causes the weld to act like a stretched rubber band, with the workpiece holding the ends (Figure 1).
For this reason, when the clamps that hold the workpiece are removed the base metal is allowed to move (or spring back) and the part is distorted.
Thinner material is more susceptible to this because it has less stiffness. Stainless steels are also more susceptible because they have greater thermal expansion and lower thermal conductivity than carbon steels.
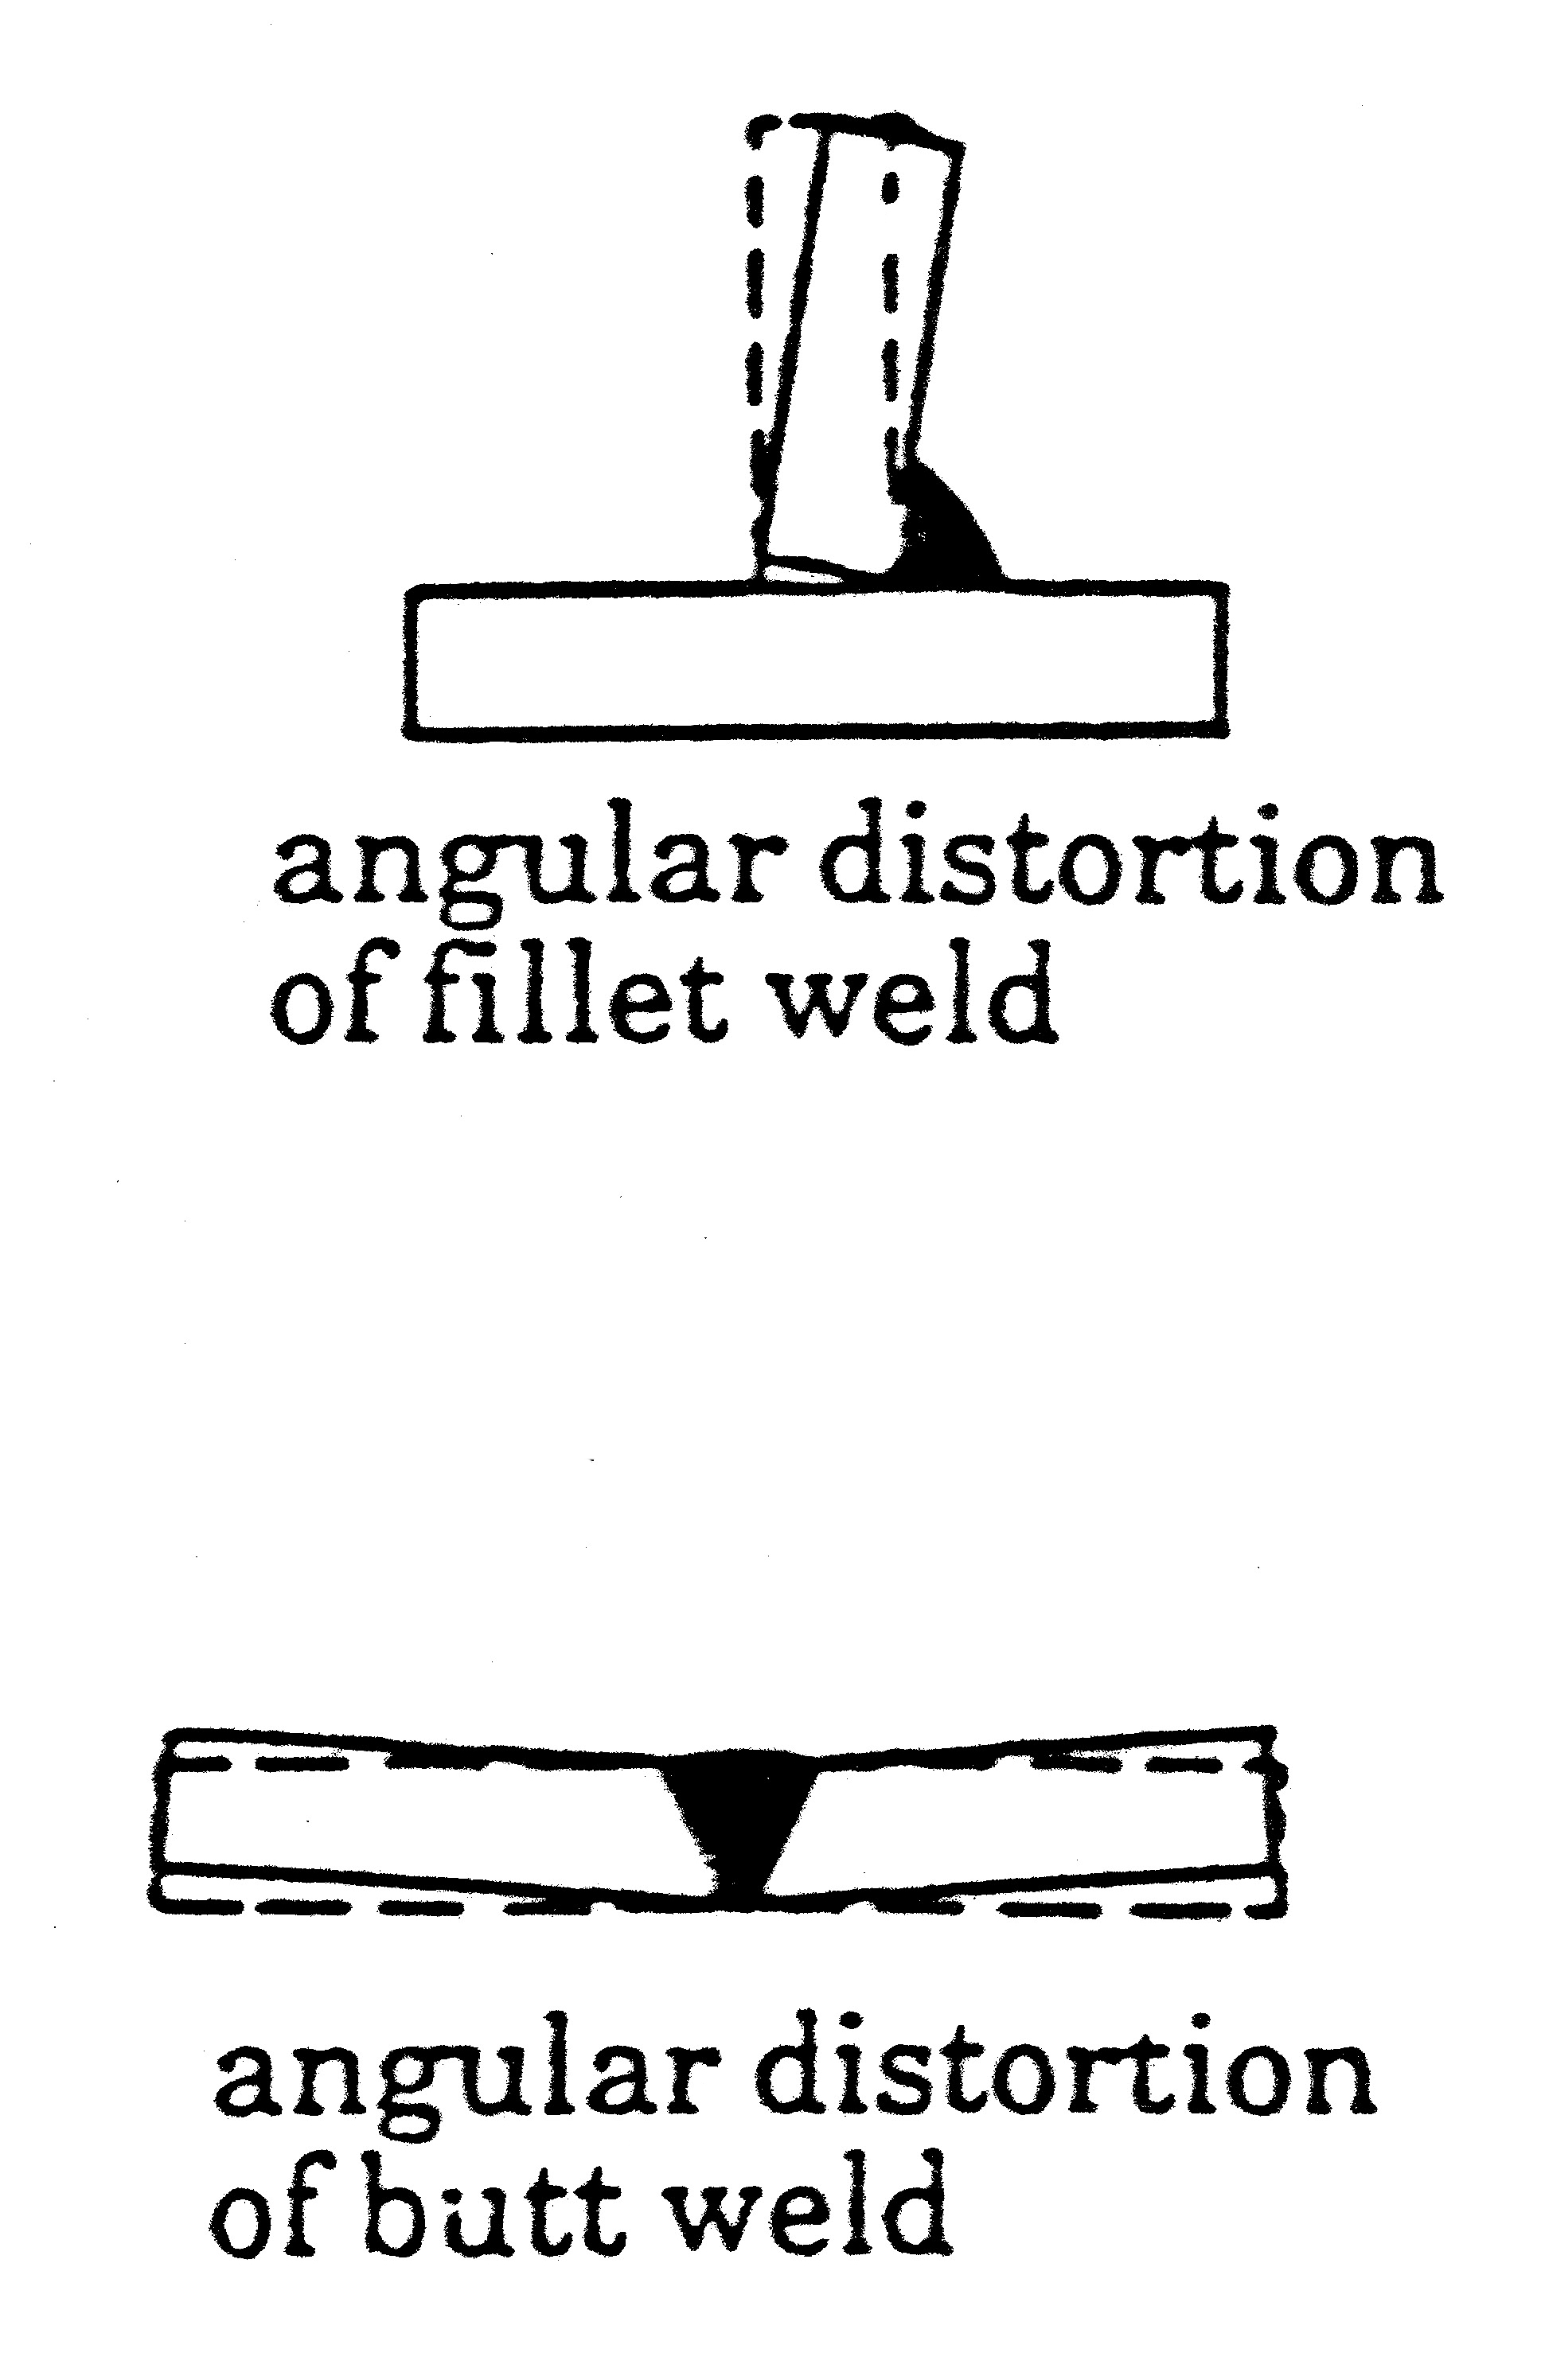
When the weld shrinks across its width, it causes groove welds to ?wing-up? or fillet welds to close up (Figure 2).
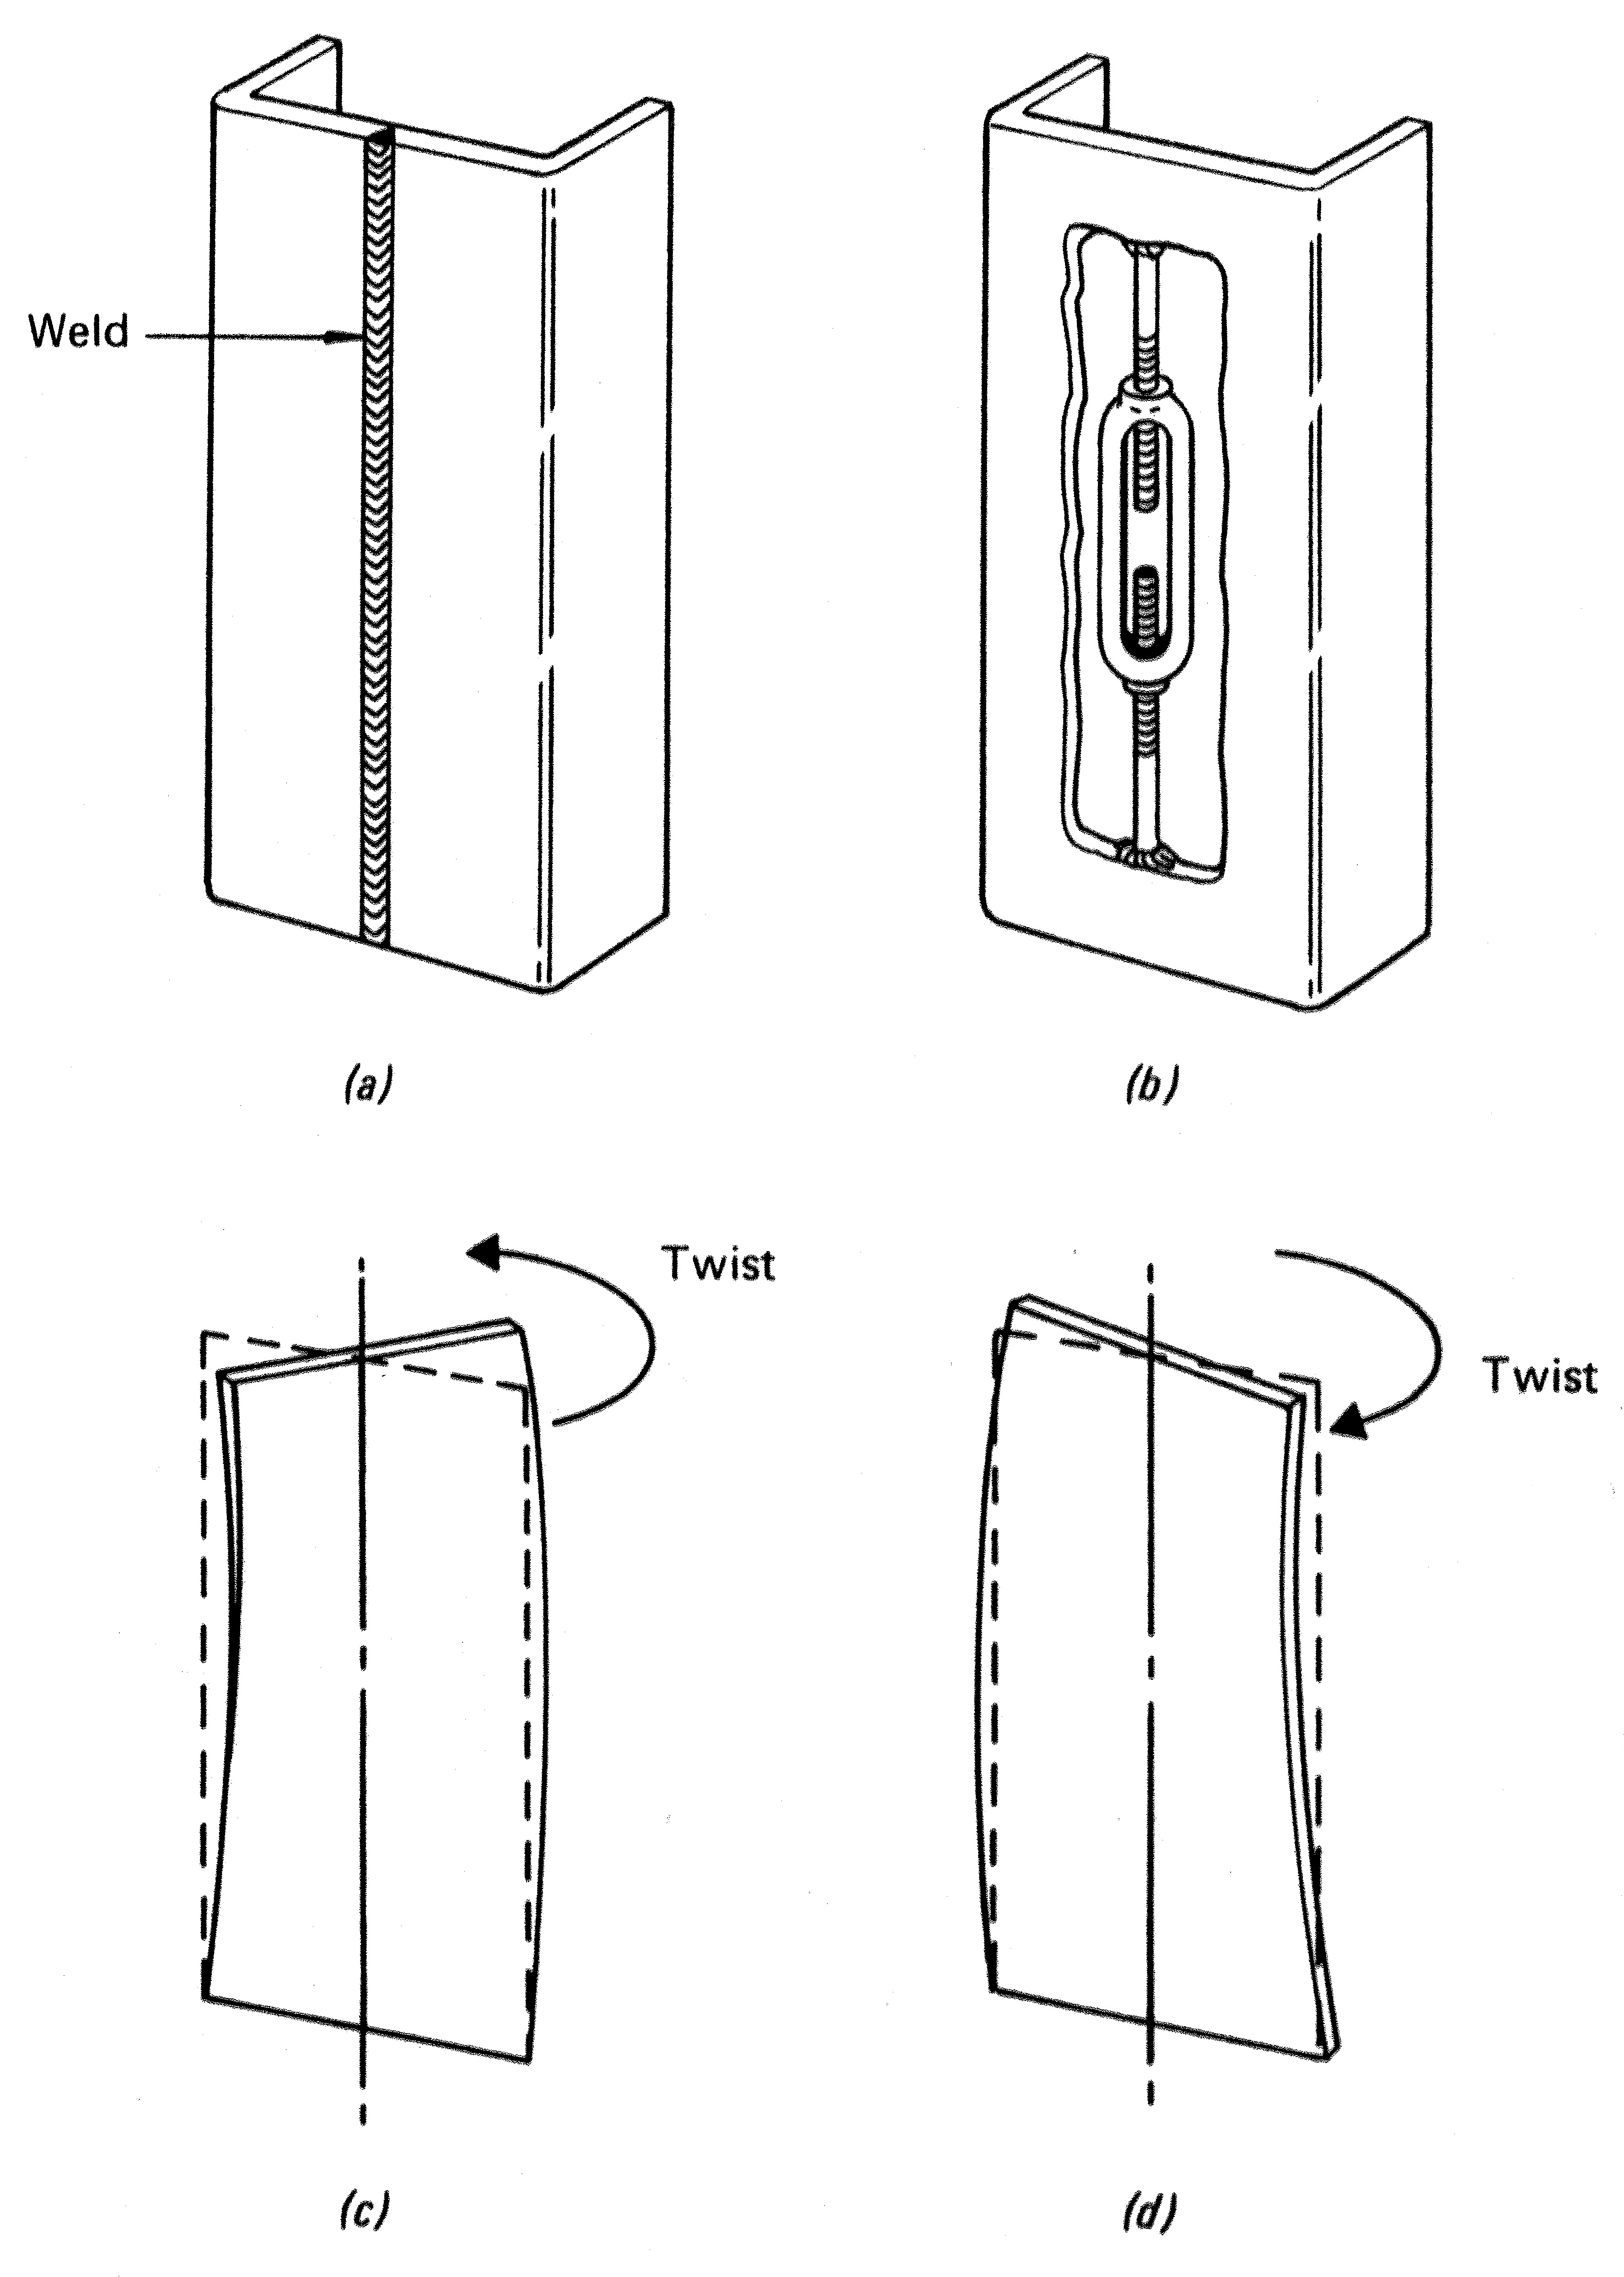
When the weld shrinks along its length, it causes base metal to twist around the weld (Figure 3). Design and welding should be addressed to minimize this sort of warping.
Though weld shrinkage cannot be prevented, it can be controlled by following these steps:
Avoid overwelding. The bigger the weld, the greater the shrinkage: correctly sizing a weld not only minimizes distortion, but also saves weld metal and time.
Intermittent welding. Use intermittent welds instead of continuous welds where possible to minimize the amount of weld metal.
Fewer weld passes. Because shrinkage accumulates from each weld pass, a fewer number of big passes results in less distortion than a greater number of small passes with small electrodes.
Place welds near the neutral axis, or the center of the part. Reduce warpage by providing less leverage for the shrinkage forces to pull the plates out of alignment.
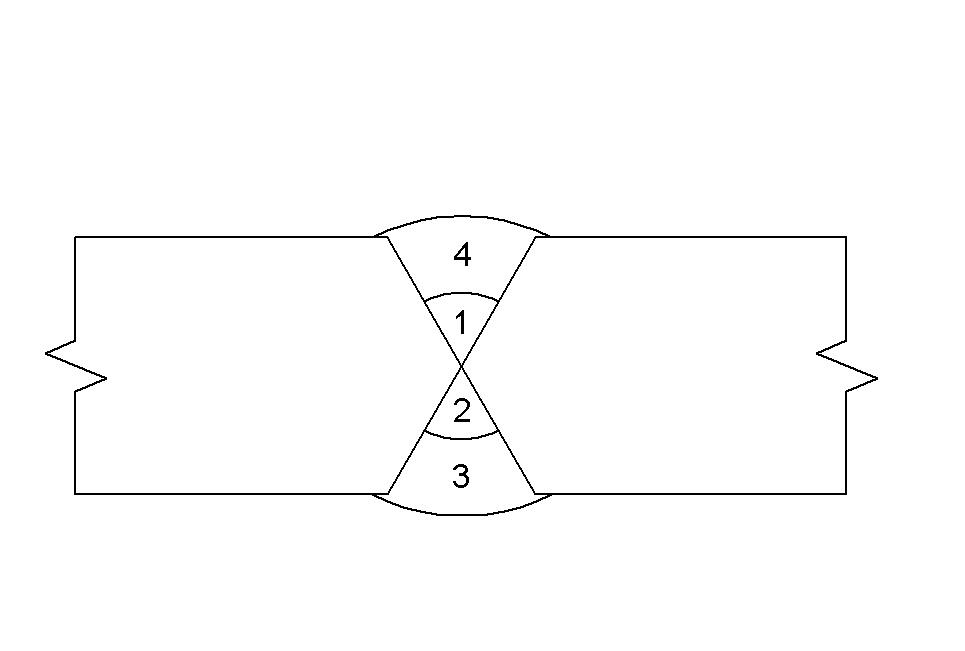
Balance welds around the neutral axis. Welding on both sides of the plate offsets one shrinkage force with another, to minimize warpage (Figure 4).
Use the backstep welding technique. The general progression of welding in this technique may be left to right, but each bead segment is deposited from right to left (Figure 5).
As each bead segment is placed, the heated edges expand, which temporarily separates the plates at B.
As the heat moves out across the plate to C, expansion along outer edges CD brings the plates back together. This separation is most pronounced as the first bead.
With successive beads, the plates expand less and less because of the restraint from the prior welds.
Presetting the parts. Presetting parts before welding can make shrinkage work for you (Figure 6). The required amount of preset can be determined from a few trial welds.
Alternate the welding sequences. A well-planned welding sequence involves placing weld metal at different points of the assembly so that, as the structure shrinks in one place, it counteracts the shrinkage forces of welds already made.
An example of this is welding alternately on both sides of the neutral axis in making a complete joint penetration groove weld in a butt joint.
Clamping. Clamps, jigs, and fixtures that lock parts into a desired position and hold them until welding is finished are probably the most widely used means for controlling warpage in small assemblies or components.
While there is some movement or distortion after the welded part is removed from the jig or clamps, it will be lower compared to the amount of movement that would occur if no restraint were used during welding.
Peening. Peening the weld bead stretches it and relieves the residual stresses. But peening must be used with care.
For example, a root bead should never be peened because of the increased risk of concealing or causing crack.
Peening on the final pass is not permitted because it can cover a crack and interfere with visual inspection. Before peening is used on a job, engineering approval should be obtained.
Thermal stress relieving. Another method for removing shrinkage forces is thermal stress relieving, i.e., the controlled heating of the weldment to an elevated temperature, followed by controlled cooling.
Subscribe to learn the latest in manufacturing.
Subscribe to learn the latest in manufacturing.

Industry News