What You Must Know About Machine Tool Probes
Sharad Munda of Marposs walks through some of the basic decision points to consider when choosing between contact and non-contact sensors, different wireless communication methods, and systems that deliver everything from simple presence detection to sophisticated precision dimensional and geometric measurement of tools and workpieces.
Posted: May 24, 2013
Here are some of the basic decision points to consider when choosing between contact and non-contact sensors, different wireless communication methods, and systems that deliver everything from simple presence detection to sophisticated precision dimensional and geometric measurement of tools and workpieces.
On-machine probing technology has come a long way from the first fragile touch probes. Today it is a vital tool that can impact both the productivity and profitability of a full range of machining operations.
Users can choose from a broad range of contact and non-contact sensors; several different wireless communication methods; and systems that deliver a spectrum of functions from simple presence detection to sophisticated precision dimensional and geometric measurement of tools and workpieces. Here are some of the basic decision points.
CONTACT OR NON-CONTACT
For applications like tool presence sensing or tool measurement, the first decision is between a mechanical contact device, commonly called a “touch setter,” and a non-contact, usually laser-based, system. Both have unique strengths and weaknesses.
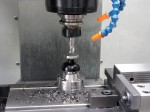
Modern touch setters are rugged, precise, and reliable under the most difficult conditions. Products such as wired and infrared probes are widely used for tool setting applications, length and diameter measurement of rotary tools, and tool breakage detection.
Because they depend on physical contact, however, tool speeds generally have to be limited to less than 500 rpm during measurement, and they will not reliably detect broken inserts on multi-insert cutters.
Laser systems, on the other hand, can reliably measure rotary tools at cutting rpm. This has the advantage of including any speed-related runout in the measurement.
A sophisticated laser system can detect broken tools as small as 10 microns diameter, as well as broken inserts on multi-insert cutters.
Touch-type and simple laser systems designed specifically for tool breakage detection (TBD) for solid tools like drills and end mills are also available. These are essentially go/no-go systems with limited tool measurement capabilities.
Certain laser unit systems have a significant speed advantage over contact-type tool presence detectors, allowing them to be used during rapid traverse with typical cycle times of two to three seconds.
A contact sensor, on the other hand, typically requires eight to ten seconds to perform a tool breakage check.
The most sophisticated laser systems will perform the tool breakage check and check the profile of the tool, including the individual inserts on a multi-insert tool, in the same two to three second cycle.
WHICH WIRELESS TECHNOLOGY?
Hard-wired touch probes for part probing applications are mostly limited to tool grinders and cylindrical grinders.
However, a spindle-mounted touch probe used for setting up fixtures and parts and for checking part details without having to remove the part on machining centers, milling machines, lathes or turning centers almost always uses one of three basic wireless technologies: high-frequency (HF), infrared (IR) or radio frequency (RF).
Each of these has unique characteristics.
HF, the oldest technology, uses a single receiver mounted at a fixed location. HF technology quickly is being supplanted by IR and RF, particularly on machining centers with more than three axes.
IR, a line of sight technology, was originally popularized on small horizontal and vertical machining centers.
Most recently, a touch probe has been introduced that features an innovative modulated optical transmission system that offers high immunity to interference, a large operating range and a wide transmission angle, making the probe suitable for use on medium to large 3- and 5-axis machines.
The system consists of a transmitter and a receiver with integrated interface. The multi-channel receiver can support up to four probes. For multi-spindle machining applications, it is possible to implement two applications on the same machine by allowing two probes to be used simultaneously.
An incredibly robust instrument, this probing system is capable of withstanding the most challenging machining environments.
RF is omnidirectional, so there are no line of sight issues. A single receiver can handle inputs from a machine with multiple axes, or from multiple probes on the machine.
RF systems with a combination of BlueTooth® and WiFi capabilities can detect and change frequencies automatically to avoid interference from other devices in a plant environment.
The latest RF systems have the additional advantage of operating on a frequency band that is available worldwide. That means they can be set-up and programmed by the manufacturer anywhere in the world and will meet regulatory requirements at the customer location, no matter where that might be.
WHAT’S THE BOTTOM LINE?
Even the simplest on-machine probing system can deliver significant value by simplifying and speeding part set-up, detecting a wrong, broken, or missing tool and stopping a machining process before the workpiece is damaged.
A laser monitoring system can increase productivity by measuring tools on the fly at the RPM of the cut and, thus, reduce runout and blending errors. But, on machine probing has benefits beyond the obvious ability to detect and measure tools.
Perhaps the most important bottom line impact of an on-machine probing system lies in its ability to perform many workpiece inspections that are normally done on a CMM on the machine tool instead.
That, of course, requires a properly calibrated and properly maintained machine tool, but the investment can be highly productive.
Limiting the on-machine inspection to the most critical features of the workpiece generally yields the greatest returns when using this technique.
In most cases, a full customer-specified CMM inspection of the finished part will still be required to meet contract stipulations.
The good news is that the likelihood of that inspection finding anything critical requiring re-machining is greatly diminished by the on-machine probing.


