


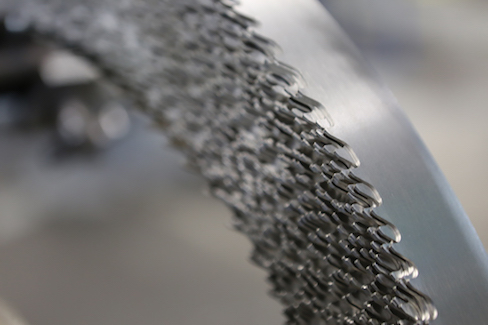
Improve Band Sawing Operations with These Solutions to Three Common Challenges
Impediments to fully optimized band sawing can be broken into three broad categories: teeth problems, blade problems, and cutting problems. These troubleshooting tips will help operators of all experience levels work as efficiently as possible.
Posted: December 1, 2020


CUTTING EDGE COLUMN
BY JAY GORDON
Knowing what causes typical band sawing challenges and how to quickly troubleshoot them can be helpful for new and experienced operators alike. Although cutting issues will vary depending on the material’s size, shape, and other characteristics, some general guidelines are a useful reference.
In addition to the tips below, I recommend consulting your band saw machine and blade manufacturer for guidance in optimizing operations.
RESOLVING COMMON BAND SAW TEETH CHALLENGES
Teeth Stripping
- Improper blade break-in. Improper break-in leads to chipped teeth, which will shorten blade life as well as possibly lead to tooth strippage. Follow the blade supplier’s recommended blade break-in procedure.
- Blade speed too slow. Blade speed depends on material type. If set too low, teeth can over-penetrate, which will put excessive stress on them, eventually causing them to strip. Follow the saw machine manufacturer’s cutting recommendations.
- Feed pressure too high. Reduce pressure to avoid over-penetration and tooth strippage.
- Tooth jammed in cut. When this occurs, don’t enter a new blade in that cut. When teeth strip, there’s a good chance tooth remnants are left in the cut. If a new blade is installed and fed into the same cut, these remnants, which are as hard as the new teeth, will probably cause the new blade to strip teeth as well. It’s always best to start a new cut or, if you must cut at the same position, turn the material over and try coming in from the opposite side.
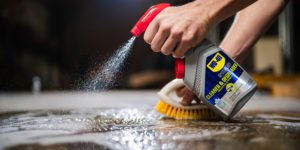
- Poor cutting fluid application or ratio. Adjusting for proper coolant flow and ratio is key because cutting fluid is necessary on almost all materials. It provides both cooling and lubrication to the cutting surface. Without it, excessive heat is generated, leading to poor blade life and possible tooth strippage.
- Hard material or heavy scale. Hard and scaley materials present their own challenges, which can be overcome with proper feeds and speeds. However, keep in mind these material types tend to be more susceptible to strippage than other materials.
- Wrong blade pitch. Using the wrong blade pitch, especially too coarse a blade, will apply too much pressure to each tooth and eventually lead to strippage. Proper tooth selection is key.
- Work moving in vise. Any movement in bundled material – or even a single bar – will cause tooth breakage. Tighten vises or use nesting clamps to ensure material is tightly held.
- Blade on machine backwards. Blades may or may not be welded with the teeth going in the correct direction for your machine. Make sure the back of the blade faces the band wheel flange so the teeth move in the correct direction when the machine is switched on. It’s an easy fix if it isn’t: Twist the blade inside out and reinstall it.
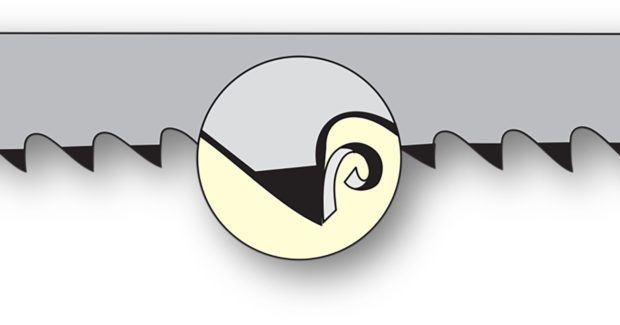
Premature Dulling of Teeth
Teeth are dulled for the same reasons they’re stripped, but there’s also one more cause. When cutting material that has a tendency to work harden, it’s imperative that each tooth penetrates. If they don’t, the blade will only rub across the material, causing premature dulling. I recommend increasing feed pressure if this occurs.
Teeth Fracture
Fractures on the back of teeth indicate the material is moving in the vise. Inspect and adjust vise, and use nesting clamps. If the material being cut is allowed to spin or vibrate, tooth breakage (fracture) due to the material hitting the back of the blade usually results.
RESOLVING COMMON BAND SAW BLADE CHALLENGES
Wear on Back Edge of Blade
- Damaged or worn backup guides. Backup guides should be in good condition because this is where the back of the blade rides when cutting. Guides should be smooth (without grooves or cracks) and adjusted properly. Replace when they’re damaged or worn.
- Excessive backup guide preload. Properly adjusted backup guides are also crucial to good blade life. If positioned to “push” the blade out, guides will quickly wear out and blades will be damaged.
- Low blade tension. Low blade tension will bow the blade as it travels between the guide arms, leading to cracking in the back of the blade. Refer to the operator’s manual for guidelines.
- Guide arms spaced too far apart. Similar to low tension, the blade will tend to bow if the guide arms are too far apart. This leads to premature cracking. Adjust the guide arms closer to the work.
- Excessive feed rate or pressure. Reduce one or both to avoid wear on the back edge of the blade.
- Blade rubbing band wheel flanges. It’s extremely important that the back of the blade doesn’t ride on the band wheel flange. Adjust as close as possible without hitting the flange. If the blade rubs the flange, it will create a sharp edge on the back and cause breakage.
Blade Breakage
- Band tension too high. A straight break indicates fatigue. Most production saws require 28,000 psi to 32,000 psi of blade tension. Always check with a gauge to maintain tension within the manufacturer’s preferred range.
- Wheel diameter too small for blade width. Use a narrower blade because the blade will break if not supported properly – and it’s usually not a straight break.
- Worn or chipped guide. Replace worn or damaged guides to prevent a break, which will likely be uneven. While a worn or chipped guide can cause a straight break, it typically gouges the back of the blade and causes crooked breaks.
- Blade rubbing wheel flange or having side guides that are too tight will result in blade breakage. Proper adjustment is necessary.
Twisted Blade
- Blade binding in cut. This is usually due to the material being sawn. Materials with high internal stresses, for example, tend to pinch the blade as it travels through the material. The only solution is to use a wedge of some sort or move to a blade with a heavier set. This will allow for a wider kerf and give the blade more room before the material closes in on it. Otherwise, adjust feed or use heavy set blade.
- Work loose in vise. Adjust vise. See previous comments about this challenge.
- Guide arms spread too far apart. Adjust guide arms closer to material. Without proper blade tension, the blade will bow and may twist, causing both breakage and crooked cuts.
RESOLVING COMMON CUTTING CHALLENGES
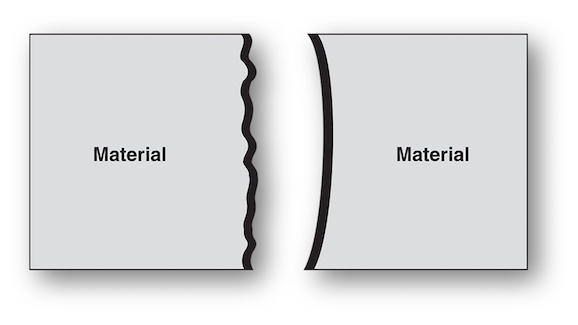
Inaccurate Cut
- Guide arms too far apart. Adjust guide arms closer to material.
- Blade worn out. Replace the blade when it’s at the end of its lifecycle because it will typically dull out and no longer cut or produce crooked cuts. Also, it is possible that the blade will break due to backer fatigue.
- Excessive or inadequate feeding. Check cutting recommendations. Excessive feed rates can cause breakage in certain circumstances, although this isn’t typical.
- Guides worn or loose. Tighten or replace guides. If guides aren’t adjusted properly, premature blade failure and possible breakage is possible.
Band Leading in Cut
- Over-feeding. Check cutting recommendations. As noted previously, blade speed, feed pressure and feed rate must be balanced according to the material being cut. If any or all aren’t near recommended specifications, crooked cutting will most likely result.
- Low band tension. Refer to operator’s manual. Without adequate blade tension, beam strength won’t be great enough to hold the blade straight, resulting in crooked cuts.
- Tooth set (side of the teeth) damaged. Check material hardness. Damaged tooth sets are caused by tracking issues as well as guide issues. If either issue is present, damage to the set is very possible and will result in crooked cuts.
- Guide arms loose or too far apart. Adjust guides and/or guide arms. Similar to low band tension, guides that are spread too far apart can cause crooked cuts because the blade isn’t supported well enough to keep cutting straight.
Chip Welding
- Worn or missing chip brush. Technically, a chip brush isn’t responsible for chip welding. However, an incorrectly installed or inoperative brush can allow chips to load up in the gullets, which can increase heat and lead to chip welding. Replace or adjust the brush.
- Improper or insufficient coolant. Coolant is important for both cooling and lubricating. Mixed incorrectly coolant or the wrong type (i.e., neither cooling or lubricating) can lead to excessive heat and chip welding. Check coolant flow and fluid type.
- Excessive feed or speed. These can cause chip welding due to heat buildup, so check the manufacturer’s cutting recommendations.
Irregular Breaks Indicate Material Movement
- Indexing while blade in work. A machine that’s not indexing correctly can push the material forward while the blade is down or not high enough, breaking the teeth. Adjust indexing sequence.
- Saw head falls into work while neutral. Horizontal saws have one or two hydraulic cylinders that control the up and down motions. It’s more common than you might think for older saws to develop cylinder issues which cause the head to leak down and come in contact with the material, causing damage. Make sure the head isn’t leaking down and the blade always clears the material.
Rough Cuts: Washboard Surface, Vibration and/ or Chatter
- Dull or damaged teeth. Once teeth are damaged, their clearances and angles will be different, causing washboard cuts. Install new blade.
- Incorrect feed or speed. Proper feeds and speeds are necessary for surface quality as well as blade life and sawing production. Running a blade too slowly will result in teeth with loaded chips, allowing the teeth to “walk.” Too fast a feed rate will also cause the teeth to load, producing a similar outcome. Refer to cutting recommendations to get these two parameters right.
- Blade not supported properly. Adjust or tighten guide arms. Loose guide arms allow the blade to move back and forth, causing the blade to search for a straight cut.
- Low blade tension. Refer to operator’s manual. Low blade tension allows the blade to “walk.” Tension should always be set to the machine manufacturer’s recommendations and a blade tension gauge should always be used.
- Incorrect tooth pitch. Like incorrect feed and speed, incorrect tooth pitch can lead to the gullets loading with chips, allowing the teeth to wander. Use proper tooth selection.
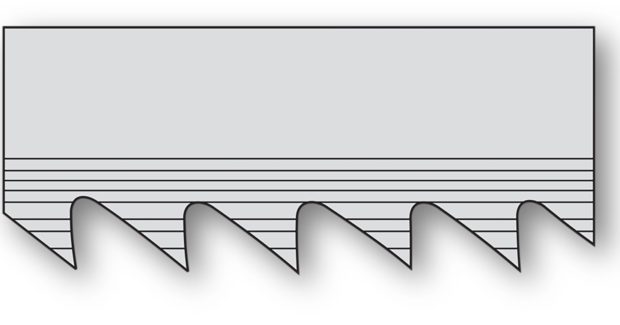
Wear Lines and Loss of Set
- Blade riding up into saw guides. Wear lines (grooves) on the side of the blades are usually caused by bad side guides. A blade riding up into the guides indicates a bad or missing backup guide. Sometimes the teeth ride up into the side guides, causing excessive wear and crooked cuts. Check for worn or missing backup guides and adjust or replace as necessary.
- Side guides too tight. Most side guides are zero clearance, meaning they should be up against the blade in a snug manner. It’s possible to over- tighten, which will lead to wear on the side of the blades. Adjust guides properly.
- Teeth riding on band wheel surface. As noted above, tracking is very important for good blade life. When properly tracked, the back of the blade rides close to but not against the bandsaw wheel flange. In addition, the teeth should be off the wheel itself to keep the wheel from flattening the tooth set. Adjust tracking or replace wheel.
- Wrong blade width for machine. Refer to operator’s manual.
- Chips being carried back into the cut. It’s possible but unlikely for the chip brush to create grooves in the blades. But if it is, replace or adjust chip brush.
- Insufficient coolant flow. Insufficient coolant generates heat, which can lead to scoring of the blade by the guides. Adjust coolant flow.
Subscribe to learn the latest in manufacturing.

Industry News